There is this amazing open source project out there, called Neural Amp Modeler. The idea behind that is to use machine learning to capture the sound of guitar amps (or other gear) and use it in your DAW.
When I first discovered it, I instantly fell in love with it. I tried Kemper, I tried Quad Cortex… However, NAM was the first that literally felt and sounded right. Other than the aforementioned solutions, you need to do the capturing using your computer. Afterwards, you can choose to either let your computer do the number crunching (training the WaveNet neural network) or use google collab. The solution has quite a bit of a learning curve, as there’s no really stream-lined software like for example ToneX offers. However, I think the quality of the results is worth all the effort!
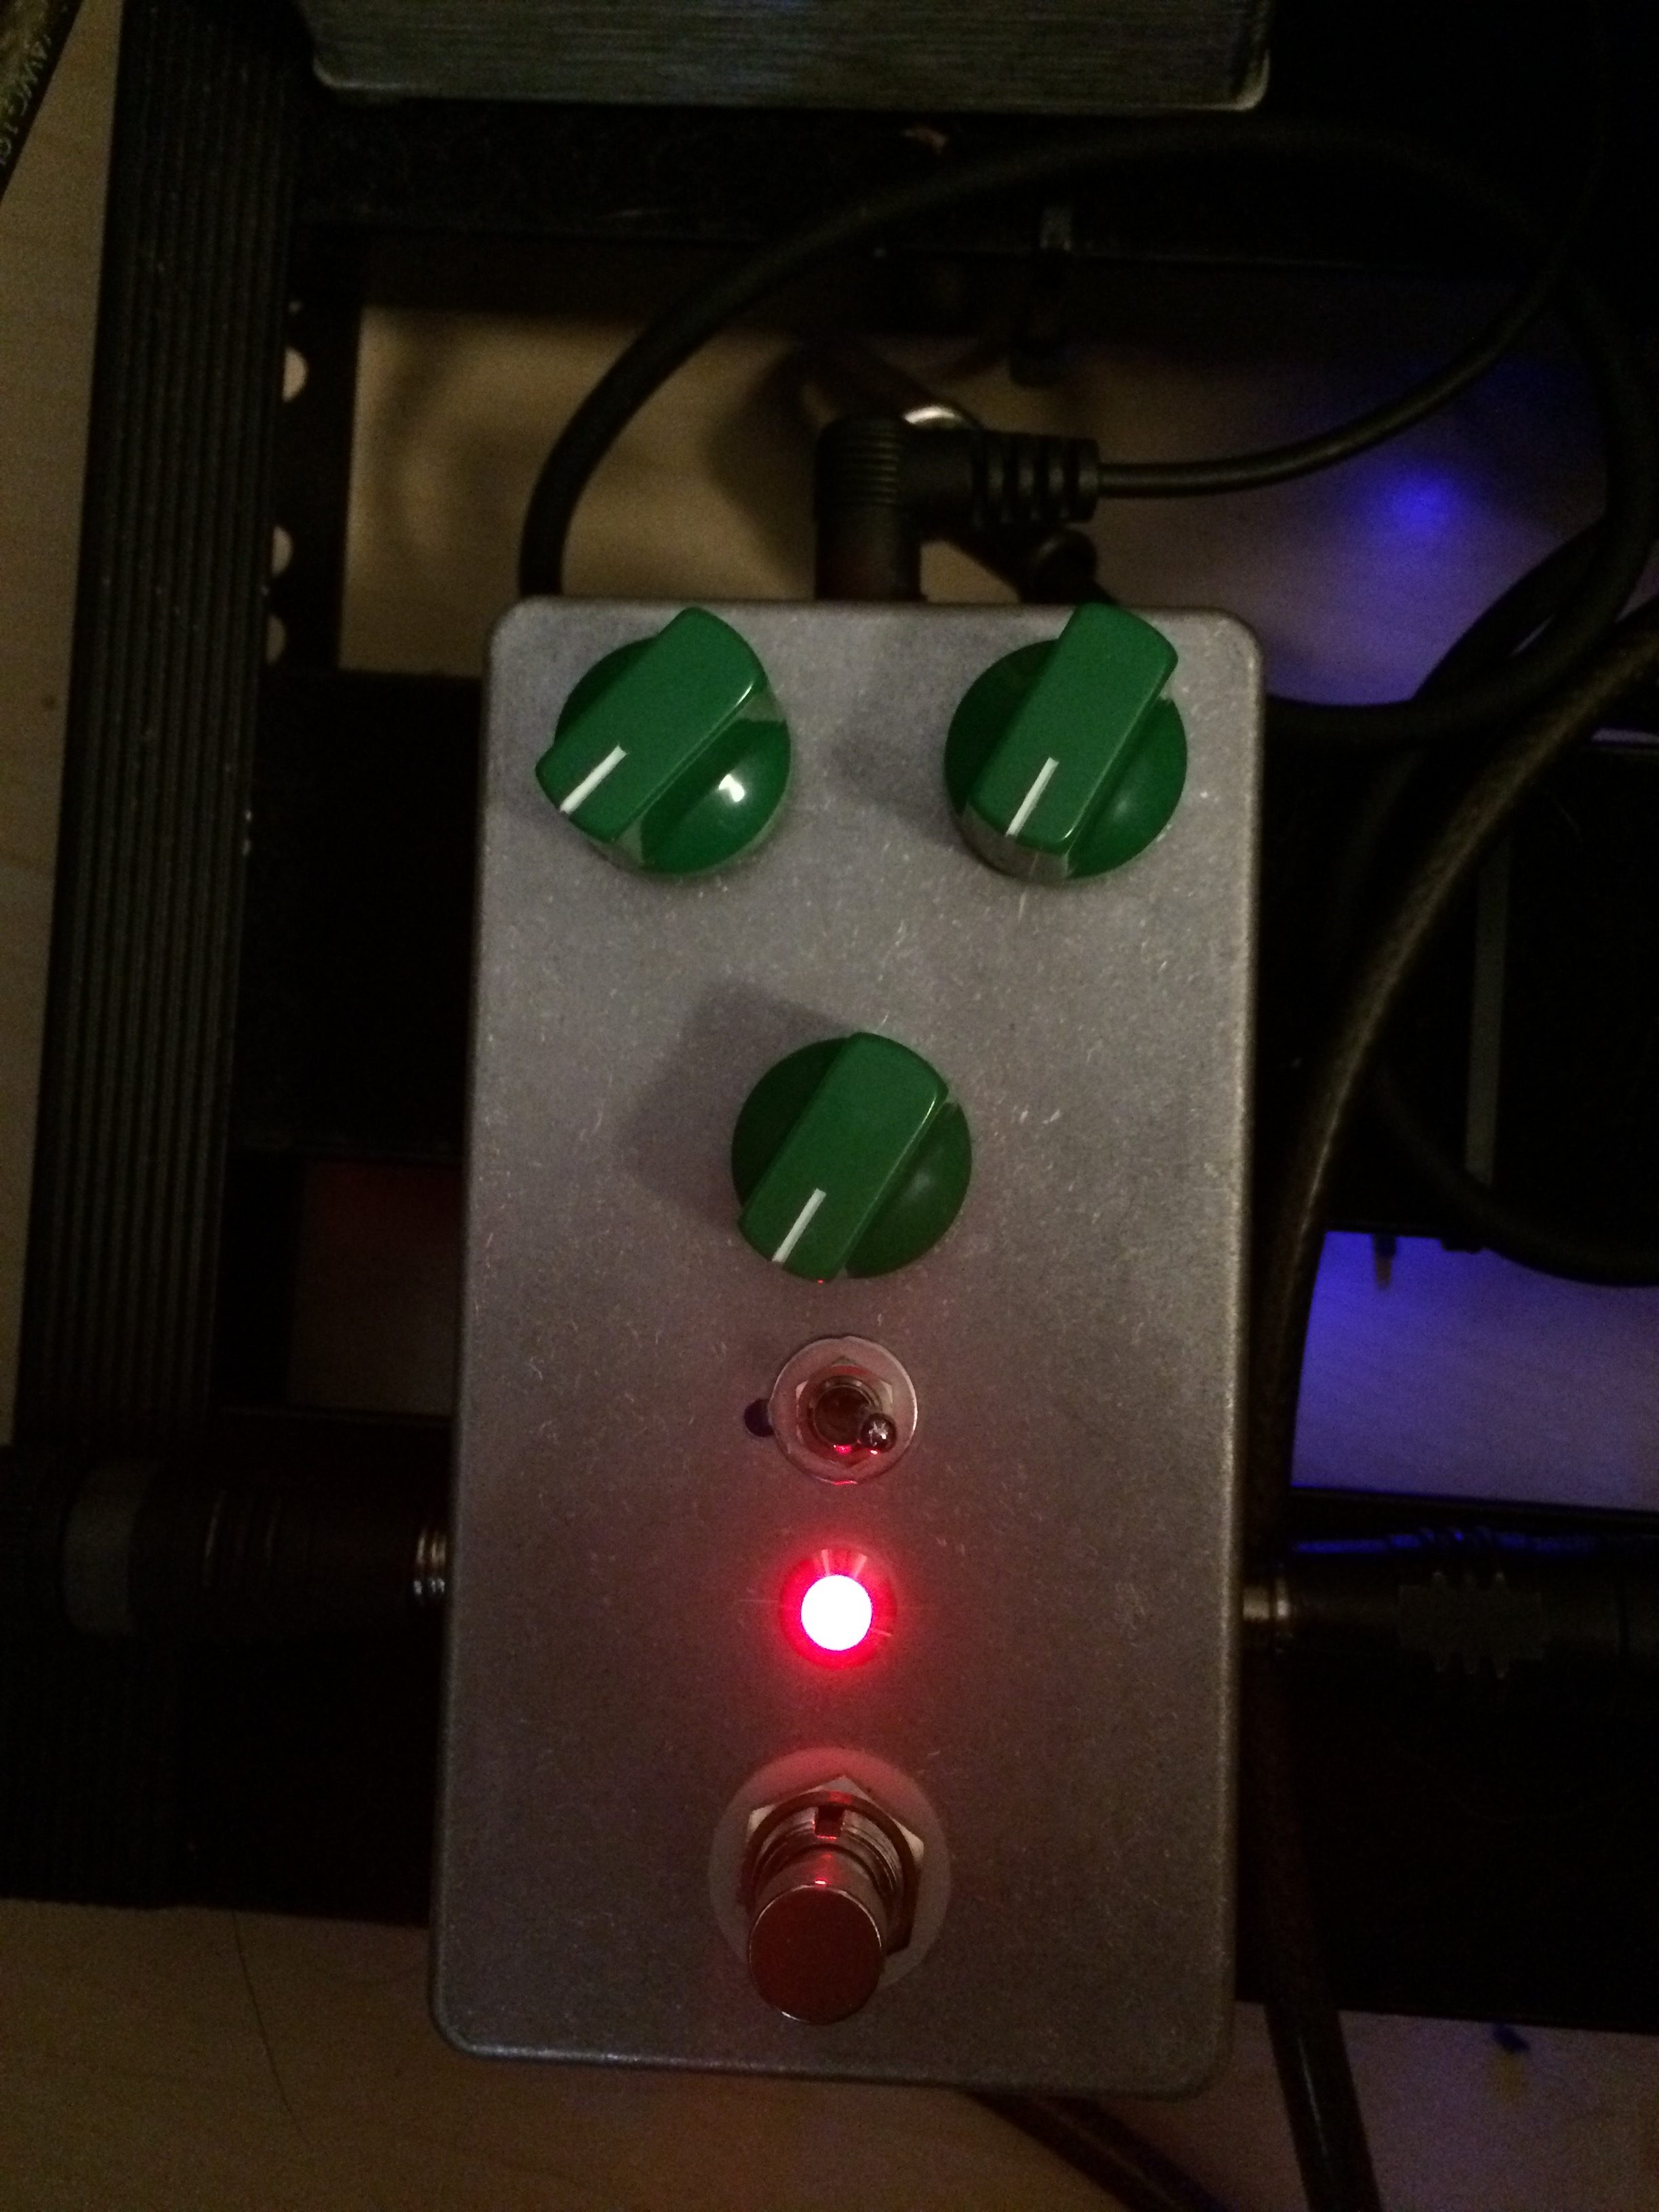
A few months ago, I discovered that a German company named Dimehead managed to put NAM into a pedal and I immediately ordered it. It arrived in the meantime and it is fun!
However, my honeymoon phase recently ended, when I plugged straight into my beloved Friedman Smallbox 50 and then used a model I created from the same amp right afterwards. They sounded different! They even felt different while playing. And that’s when I went down the rabbit hole.
Re-amping
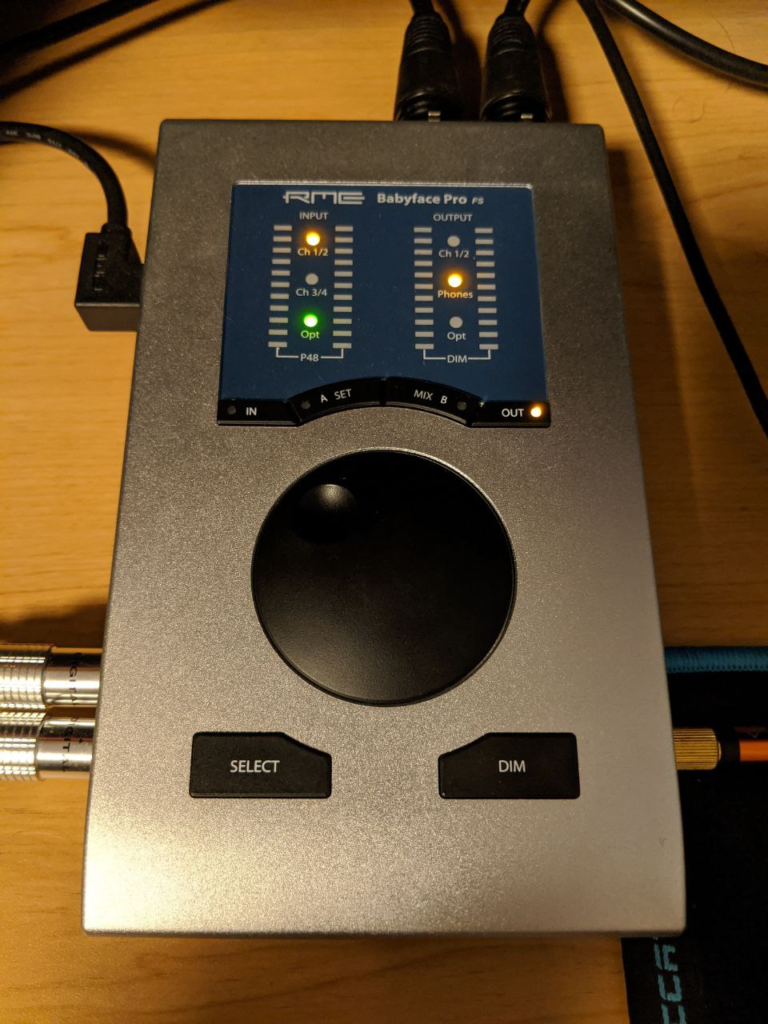
I re-setup my re-amping chain, using my RME Fireface UCX II along with a Palmer trave re-amp box. Between load box and my interface’s input, I’m using a Palmer PAN01 to capture the DI signal from the amp. I sent that through my favorite IR on my PC. Then I plugged my guitar into the HiZ input of my interface and sent it through the Palmer trave to my amp. I compared that to plugging straight into the amp. The re-amped signal was lacking some presence, but it actually matched the NAM profile perfectly! The next step was to attach my oscilloscope to the trave’s output, sending out a sine wave at 1kHz at 0 dBFS, and adjust the re-amp box’s level to 3.08 volts RMS, which equals 12dBu. That should leave enough headroom for, for example, direct recordings of humbucker guitars. Still I couldn’t get closer to the experience of plugging straight into the amp.
The next step in my journey was trying a Lehle P-Split III I had lying around for a different purpose. Here, no adjustment on the box itself was possible, so I had to adjust my audio interface’s output accordingly. Still not getting closer to plugging straight into the amp.
The last thing I did was ordering a few more re-amp boxes and testing those.
The Boxes I have tested
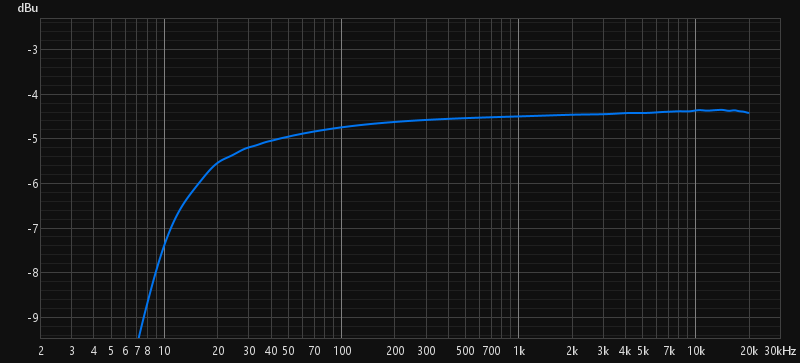
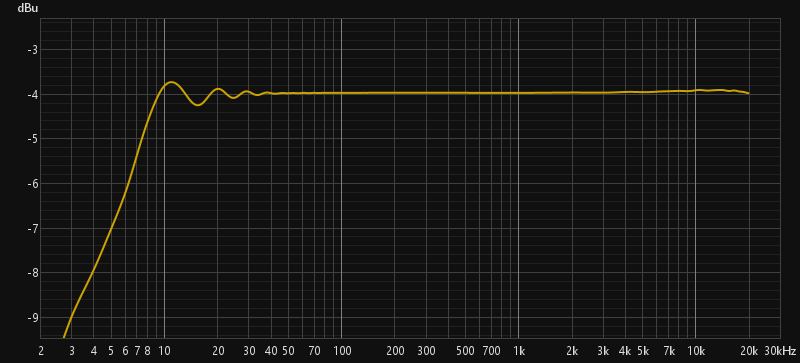
To be honest, between the re-amping boxes, I couldn’t hear that much of a difference. So I ended up sending frequency sweeps through all of them and looked at the results. Unfortunately, I didn’t pay much attention to calibrate their outputs to 12 dBu, like I did before. So, pardon me for having the levels a little all over the place. I might re-do those tests in the future.
First, here’s a loopback sweep of my interface’s instrument input. The input was set to 13 dBu with the gain set to 0. The output of the interface was set to 13 dBu as well. REW’s sweep generator was set to -12 dBFS.
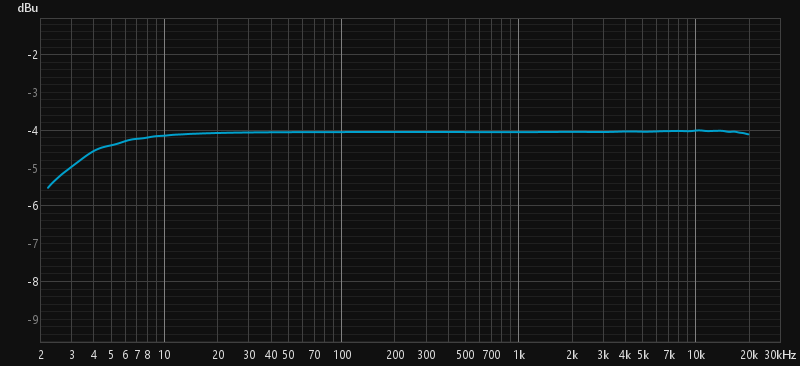
Now here’s the response of my Palmer trave:
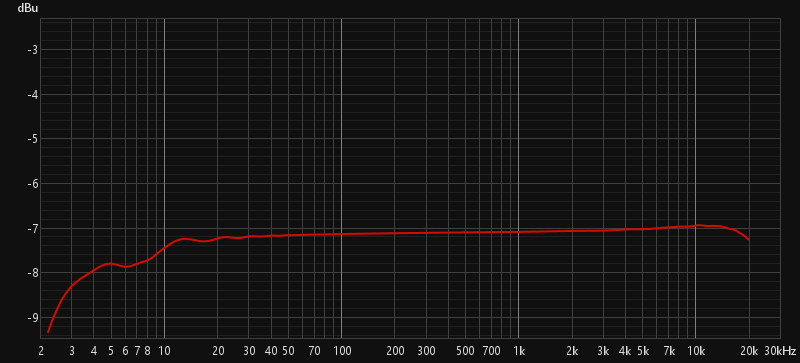
I also tested a United Studio Technologies Replay Box. Like mentioned before, I didn’t calibrate it to output 12 dBu. However, I adjusted it by ear to get as close to plugging straight into the amp gain-wise, which coincidentally resulted in the box’s level knob to point exactly at 0 (on a scale from -inf to +4).
Transparent mode:
and here’s the harmonic mode of the same box:
Now, the Lehle P-Split III, which isn’t per-se a re-amping box, but works for that as well:
And finally, here’s a Walrus Audio Canvas Re-Amp. Level knob cranked:

I don’t know where those “waves” below 40 Hz are coming from. However, it’s telling me that you can’t go wrong with any of these boxes, with the Canvas being the exception. Your re-amped signal might actually sound way too bright/brilliant with that.
Conclusion
I couldn’t solve my initial problem of not achieving the same tone of a guitar plugged straight into the amp when I either re-amp or use a NAM model. However, after putting a bit of thought into that: When are we actually plugging straight into some amp? We often tend to use our favorite pedals in the chain, cables of different quality or length. All that clearly alters the sound. And what do we do? Of course! We adjust our amps to achieve a tone we connect with. The same can be done when we are re-amping. Adjust everything so you have a tone you love and then you should be set for capturing for your NAM models.
EDITED: After some feedback, I altered the article to better reflect the chain of events. Thanks for all the input! 🙂